
Vue
Use the organization browser SDK in your Vue app. Vue owns the page and its components; Plandalf opens the checkout and renders the campaign widgets.
This guide uses Vue 3 and the browser SDK. It does not require a Vue-specific Plandalf package.
Note. Verification status Checked locally with Vue 3.5.43 on 2 October 2026: a button rendered after SDK readiness opened checkout, removing and remounting it worked, a countdown reached its final tier, and the test-partner badge appeared. A USD 50 final-tier sandbox purchase matched a paid invoice and one attributed test sale with a USD 15 commission preview. A separate declined attempt received no payment and created no affiliate sale. A follow-up run reopened checkout on the same page after a successful purchase and after a declined attempt. Earlier-tier purchases, renewals, refunds, fulfilment and a clean account-to-purchase replay remain pending. The local SDK includes unreleased fixes; recheck your deployed SDK before publishing your integration.
Before you start
- A Vue 3 application where you can edit the root HTML and components. For a new app, follow the Vue quick start.
- A Plandalf organization and its public SDK URL, copied from your own setup. The
acmehost below is a placeholder. - A published offer with a product, price and confirmed test payment connection. Follow Create an offer and Pricing.
- For a timer: a published promo and a known tier schedule. Follow Create a promo.
- For affiliates: an enabled program and a dedicated test partner link from Affiliate quickstart.
Keep provider secrets and private API keys on your server. Browser examples need the public organization script URL and public offer/promo slugs only.
The linked offer setup guide includes real product and price creation screenshots. Its USD 25 draft has no payment connection; the USD 50 paid result below comes from a separate existing sandbox fixture. Complete setup in your own test organization before following the payment steps.
Load the SDK once
In a Vite Vue app, put this in the root index.html, before your app entry script. Replace the host with your organization SDK URL. The queue lets components register a ready callback while the script loads.
<script>
  var plandalf = plandalf || function () {
    (plandalf.q = plandalf.q || []).push(arguments);
  };
</script>
<script src="https://acme.plandalf.dev/js/plandalf-sdk.js" async></script>
Load it once per document. Route changes should reuse that SDK instance. For server-rendered Vue, perform browser SDK work inside onMounted; do not reference the browser global during server rendering.
Render a checkout button
Use Vue’s attribute binding for the offer slug. The SDK observes new DOM nodes, so a button created by v-if or a route component can attach after the SDK has loaded.
<script setup>
import { computed } from 'vue';

const props = defineProps({
  offerSlug: { type: String, required: true },
});
const buttonKey = computed(() => props.offerSlug);
</script>

<template>
  <button
    :key="buttonKey"
    :data-plandalf-present="offerSlug"
    data-plandalf-mode="test"
  >
    Open test checkout
  </button>
</template>
Expected result: clicking the button opens your offer in a modal. Check the product, currency and total before proceeding.
The SDK captures button attributes when it attaches. Updating an existing DOM node’s offer, promo, mode, price or frame attribute does not replace its existing click handler. Include those changing settings in the Vue :key, or remove and remount the button. See Vue attribute binding.
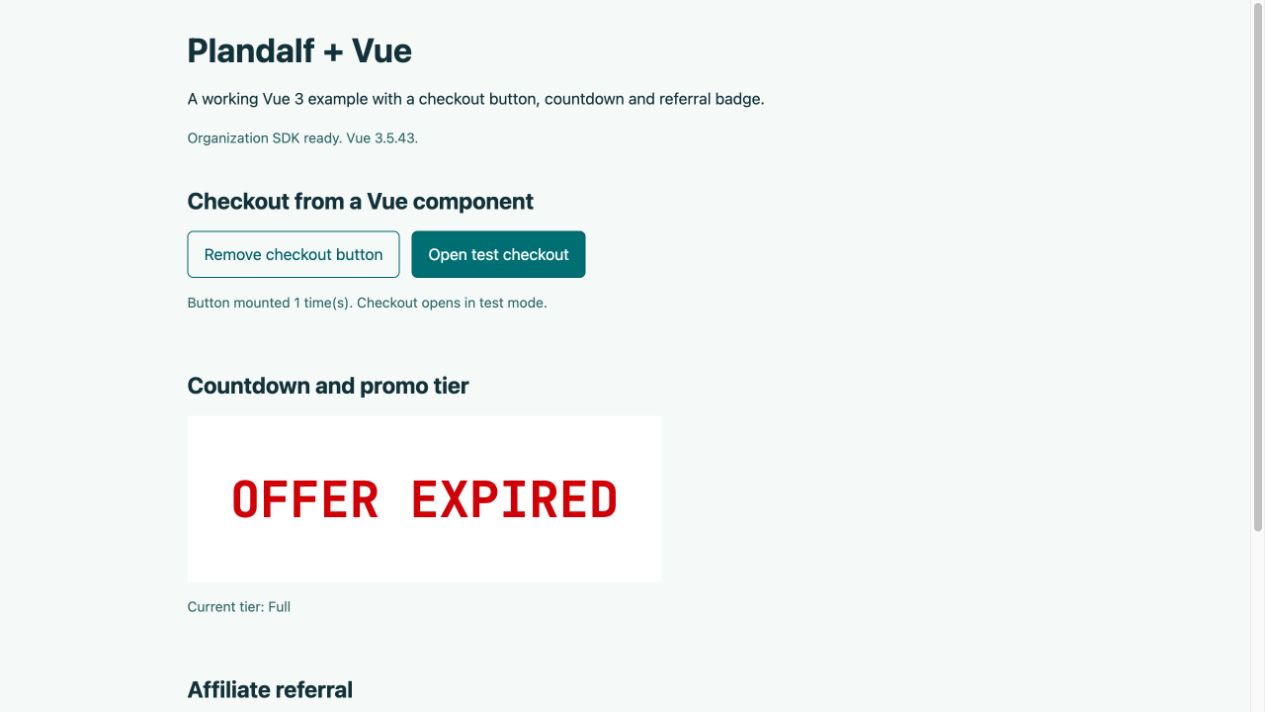
Local example after a reload. The button is created by Vue after SDK readiness.
- Open the checkout from the newly rendered Vue button.
- The fixture shows the mount count so you can repeat removal and remounting.
Check route and component changes
- Render the button after the SDK is ready and open checkout.
- Close the checkout, remove the button with
v-if, then render it again. - Open it again and confirm one checkout opens with the intended offer.
- Change the offer slug with a matching change to
:key, then check the new offer.
The first three steps passed in the local example. Changing to a different offer and navigating an application’s actual router still need testing in your app.
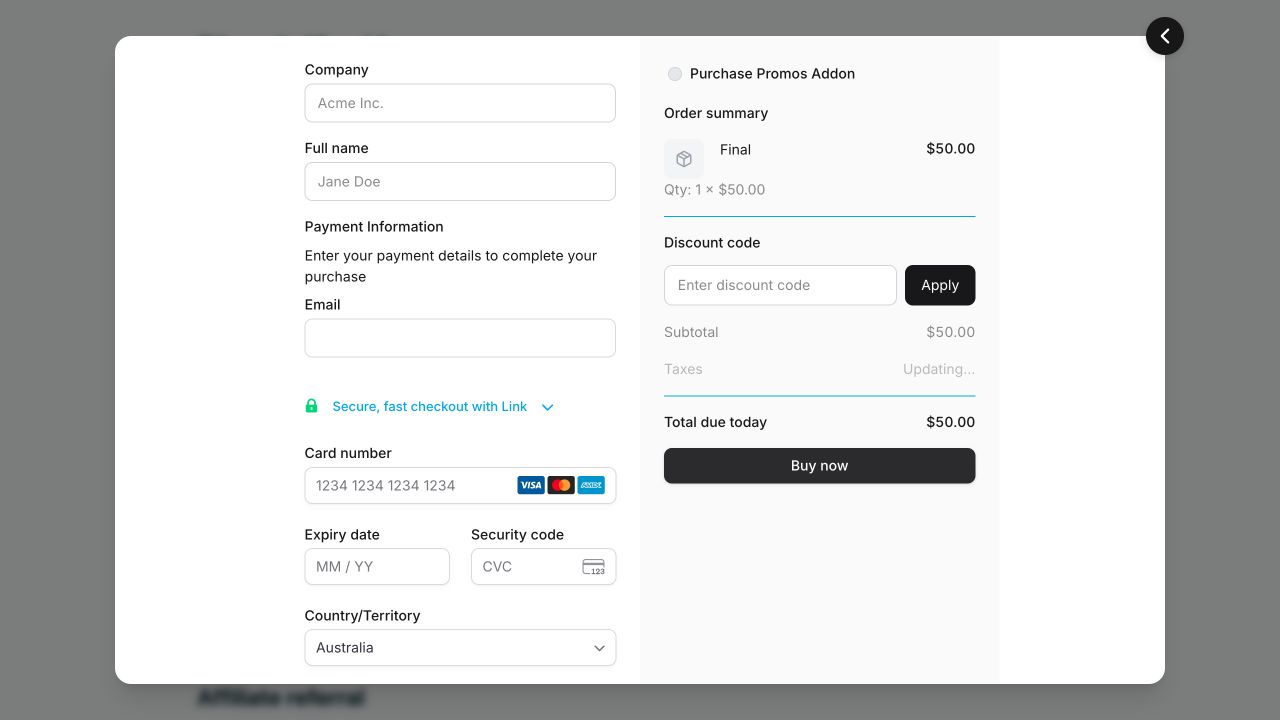
The remounted button opened the actual local checkout. This capture shows an unsubmitted form, not a completed payment.
- Check the item and amount against the expected offer and promo tier.
- Verify currency, taxes and final total before submitting a sandbox payment.
Add a timer and apply the promo
A countdown and checkout pricing are separate parts of the setup. Mount a countdown into a Vue template ref, then bind the same promo slug to the checkout button using data-plandalf-apply-promo.
The component below owns one promo handle. It waits until Vue has mounted its target and then waits for SDK readiness. It disables automatic redirects so you can inspect the deadline in place.
<script setup>
import { ref, onMounted, onUnmounted } from 'vue';

const props = defineProps({
  promoSlug: { type: String, required: true },
});
const countdown = ref(null);
const tier = ref('Loading');
let handle;
let disposed = false;

onMounted(() => {
  plandalf('ready', async (sdk) => {
    if (disposed) return;
    handle = sdk.promo(props.promoSlug, {
      target: countdown.value,
      redirect: false,
    });
    const state = await handle;
    if (disposed) return;
    tier.value = state?.activeTier?.label || 'Unavailable';
    for await (const event of handle.events) {
      if (disposed) break;
      tier.value = event.type === 'tier-change'
        ? event.to || 'Expired'
        : 'Expired';
    }
  });
});

onUnmounted(() => {
  disposed = true;
  handle?.close();
});
</script>

<template>
  <div ref="countdown"></div>
  <p>Current tier: {{ tier }}</p>
</template>
Use this button when applying that promo:
<button
  :key="`${offerSlug}:${promoSlug}`"
  :data-plandalf-present="offerSlug"
  :data-plandalf-apply-promo="promoSlug"
  data-plandalf-mode="test"
  data-plandalf-no-redirect
>
  Open test checkout
</button>
data-plandalf-no-redirect skips the button’s automatic promo monitor. The component above starts the monitor explicitly with redirect: false; the checkout still receives the promo slug. Choose your production expiry behavior deliberately and test it before removing these settings.
Promo handles are shared by slug within one SDK instance. Keep one owner for a campaign’s monitoring and cleanup: closing a shared handle also stops its other listeners. If several route components use the same promo, put ownership in their shared parent. Remount the timer component when its slug changes. See Vue lifecycle hooks.
Verify the checkout price before and after the deadline. A countdown reaching zero does not by itself prove a discounted payment was charged correctly. A campaign may move into a permanent final tier while the widget reads “Offer expired”; confirm the configured tier and checkout behavior separately.
Show the affiliate referral
Preserve the program’s referral parameter on the initial page URL, for example ?via=TEST_PARTNER_CODE. Use the actual parameter configured for your program. Mount the badge after the DOM and SDK are ready:
<script setup>
import { ref, onMounted, onUnmounted } from 'vue';

const badge = ref(null);
let disposed = false;

onMounted(() => {
  plandalf('ready', (sdk) => {
    if (!disposed) sdk.referral({ target: badge.value, theme: 'light' });
  });
});

onUnmounted(() => { disposed = true; });
</script>

<template>
  <div ref="badge"></div>
</template>
Check that the expected test partner appears. Reload and navigate through your actual app routes, then repeat checkout. For a complete affiliate test, reconcile the resulting invoice, referred sale and commission record using Plandalf checkout attribution. A displayed badge is page attribution evidence; a test commission is not payable earnings.
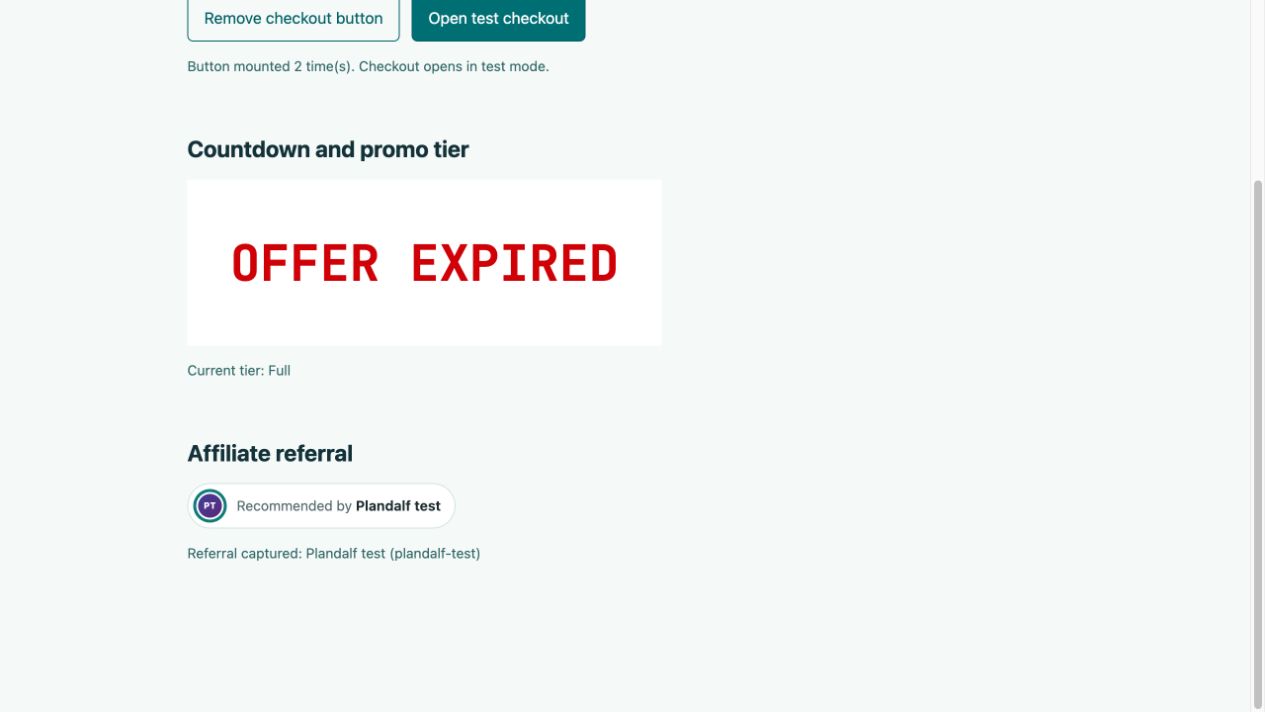
Real local Vue page after the deadline. The final campaign tier and test referral remain visible.
- The countdown deadline has passed; confirm the resulting tier and checkout price.
- The dedicated test partner appears in the referral badge. Verify a paid sale separately.
Complete a sandbox purchase
- Confirm the actual payment connection is in test mode, the intended price and currency are correct, and the rendered checkout also uses test mode. Inspect its provider binding. A one-time price may receive its Stripe binding when checkout prepares payment; verify that resulting binding and payment after submission. Stop if any part is live or unknown.
- Use a controlled test buyer and the payment provider’s documented sandbox method, such as Stripe testing cards. Check the amount again, then submit once.
- Match the buyer confirmation to a paid Plandalf invoice and the provider’s successful test payment. If the result is unclear, inspect those records before retrying.
- For a promo, compare the charged line-item amount to the tier that should apply at purchase time. Repeat on both sides of the deadline with dedicated fixtures.
- For affiliates, verify the same invoice has the intended partner and exactly one referred sale/commission calculation. Test renewal and refund behavior if you sell subscriptions.
- Finish any post-purchase steps, then reopen checkout on the same page. Confirm that the new form and payment inputs finish loading. Also close and reopen after a declined attempt, and check your app after route navigation.
Keep the test environment until these checks pass. The checkout-form screenshot above stops before payment; match your own paid records independently.
Verified sandbox purchase
The local Vue run completed one USD 50 purchase in the permanent Full promo tier. Stripe reported a successful test payment for 5,000 cents. Plandalf invoice RCP-000048 was paid for the same amount and contained the intended final-tier price.
The invoice had one referred test sale. Its USD 15 commission calculation was marked skipped with reason test_or_preview, so it did not become payable earnings. Reprocessing that invoice’s affiliate calculation kept the same sale and commission. This is an internal invoice-processing retry check; it does not establish external webhook delivery or a refund result.
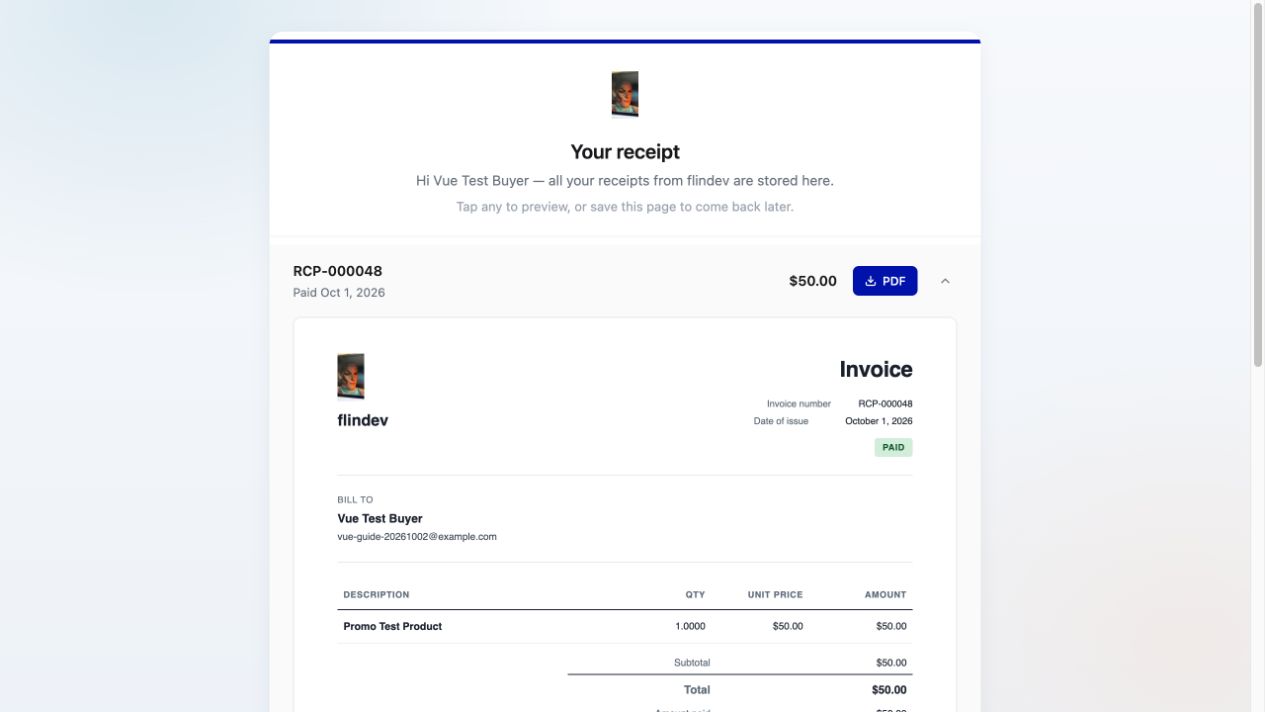
Receipt opened separately after reconciling the Vue purchase. The buyer data is synthetic. The receipt displays 1 October in its date format; the run took place on 2 October in Sydney.
- Match the receipt number and $50 total to the Plandalf invoice and Stripe test payment.
- The invoice is paid. Verify affiliate and fulfilment records separately.
This separate receipt view does not prove that an email or automatic receipt redirect reached the buyer. Configure and test your intended confirmation path.
A follow-up run completed another USD 50 sandbox purchase (RCP-000049). This offer displayed an optional upgrade step after payment; choosing “No thanks, I’ll pass” finished the journey and closed checkout. Clicking the same Vue button then opened a new test session with empty buyer fields and the expected $50 total, without reloading or remounting the button. Reopening after a declined attempt also worked. Wait for the form and payment inputs to load before treating an initial unchanged screen as a failure.
Verify a declined attempt
In a separate test session, Stripe’s generic-decline card produced the error below. Stripe reported requires_payment_method, card_declined and zero received. The Plandalf invoice remained unpaid, and no referred sale was created.
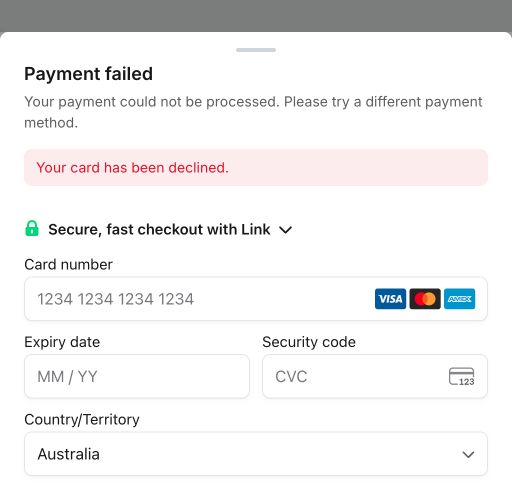
Cropped real failure drawer from the separate sandbox decline attempt. No real card details were used.
- Confirm that the buyer sees the decline message and no paid outcome is recorded.
Before retrying, inspect the invoice and provider record. Use a different sandbox method only after confirming the failed attempt received nothing. Closing the drawer is not proof of cancellation or a refund.
Add fulfilment when required
Grant paid access from a verified server-side payment or delivery event. A browser checkout callback is useful for updating the page but is insufficient as authorization to unlock protected content.
Choose and test your actual automation destination separately. Vue does not automatically create a membership, send a course enrolment, or synchronize a third-party account. Retry the destination delivery and confirm it does not grant the same purchase twice.
Troubleshooting
| Symptom | Check |
|---|---|
| Nothing happens when clicked | Confirm the SDK URL loads, the offer is published, and the button has data-plandalf-present. |
| Button opens the previous offer | Change the Vue key or remount the element when SDK attributes change. |
| Countdown missing | Confirm the target exists after onMounted, the promo is published, and one component owns its handle. |
| Page redirects during testing | Confirm no other element or component starts the same promo with default redirect behavior. |
| Badge missing | Check the program, partner link, expiry, consent/storage behavior and any configured badge holdout. |
| Timer changed but checkout amount did not | Confirm the same promo slug is bound to checkout and inspect its configured tier price mapping. |
Integration overview
See Plandalf with Vue, Custom HTML, and the Browser SDK for the wider integration and API reference.
Replay the Vue component, one step at a time
These screenshots come from a real local Vue 3.5.43 replay on 8 October 2026. They verify SDK readiness, button mounting, opening and closing checkout, and button removal/remounting. They do not verify initial account setup, a payment, fulfilment, Vue Router, or a released SDK.
The example is in scripts/integration-factory/fixtures/vue/ in the site repository. Install its locked dependencies with npm ci --ignore-scripts, then follow its README to serve it on a loopback address and open the printed URL.
This browser already held a referral for Plandalf test: the badge appeared even though the partner field was empty. It is retained browser state, not evidence of capturing a new partner visit or earning a commission. Use a clean test origin/profile for that separate check. The existing offer now displays a monthly $25 product; historical $50 payment records do not verify this configuration.
Open the example
Start the Vue fixture and open its local URL. The initial form is empty; it must not contain a private API key.
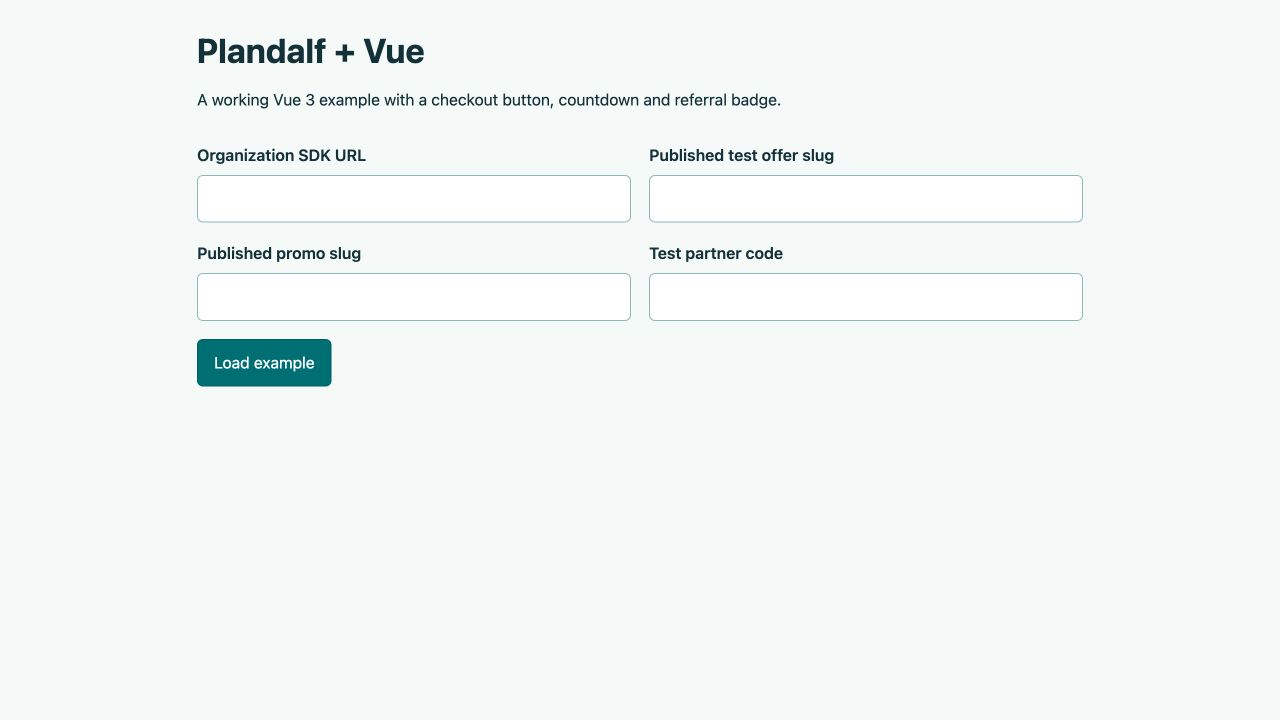
Enter public SDK configuration only.
- Enter the Organization SDK URL.
- Enter the published test offer slug.
Enter your public configuration
Paste your organization SDK URL and published test offer slug. The local host and offer in this screenshot are test-fixture values; use your own values. Leave optional promo and partner fields empty for the basic component check.
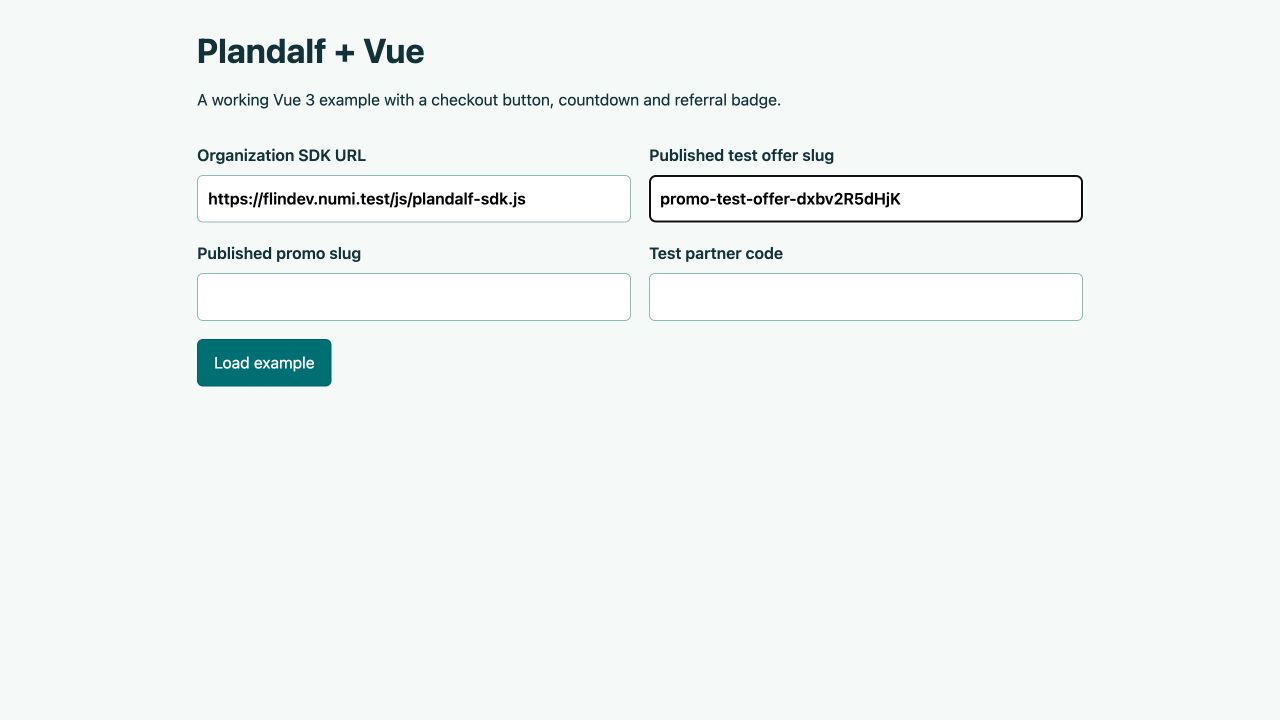
Leave optional fields empty for the basic component check.
- Confirm the public SDK URL.
- Confirm the offer slug.
- Choose Load example.
Load the SDK
Click Load example. Wait for Organization SDK ready before mounting a button. If this message never appears, stop and resolve the SDK URL or network error.
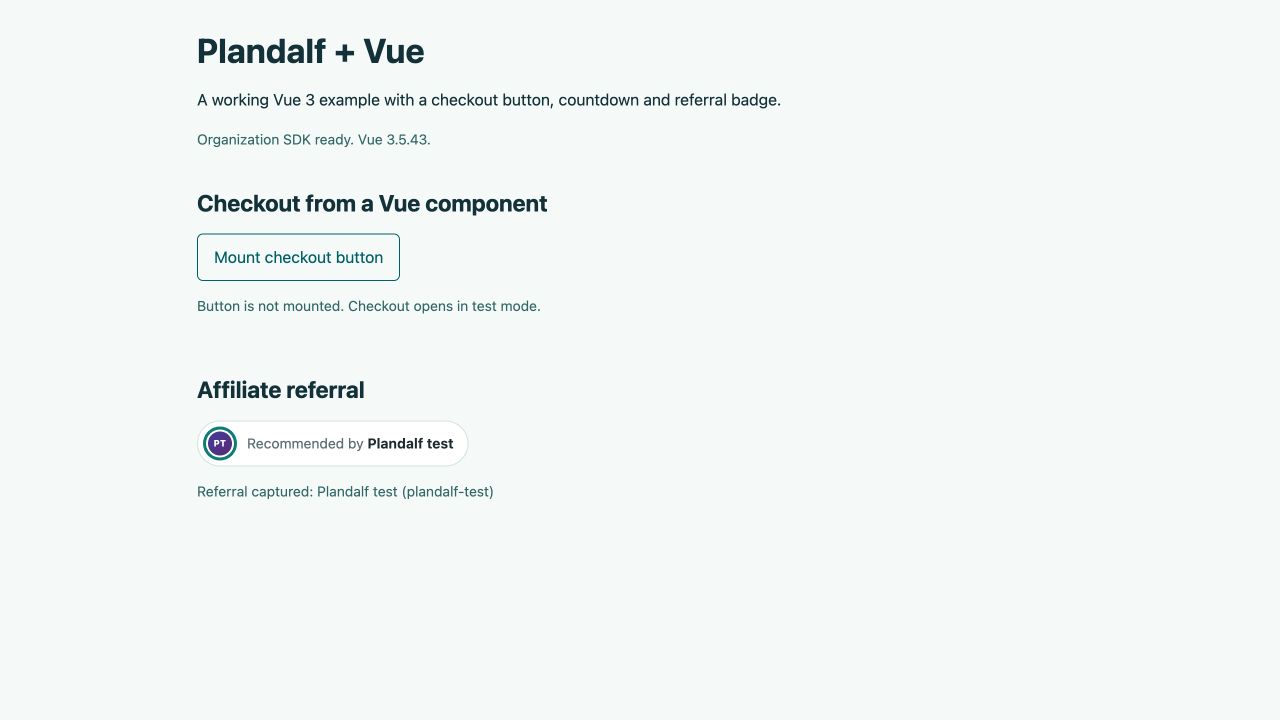
Wait for readiness before mounting the checkout action.
- Confirm Organization SDK ready.
- Choose Mount checkout button.
Mount the button
Click Mount checkout button. Verify Open test checkout appears and the mount count is one.
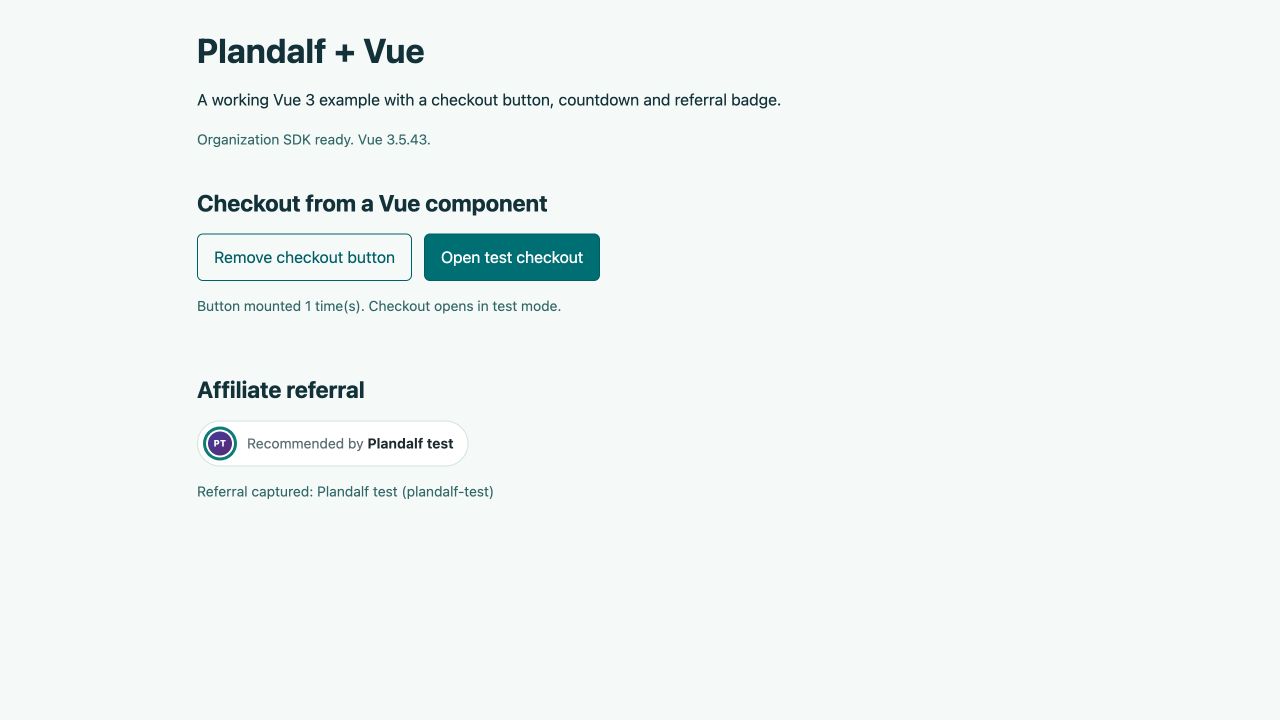
The mounted component exposes one checkout action and a mount count.
- Choose Open test checkout.
- Confirm the button mounted once.
Open checkout
Click Open test checkout. Inspect the actual product, price and billing interval. This run showed Plandalf Checkouts Monthly, billed monthly, with $25.00 due today. Do not submit payment until the processor sandbox and intended price have been independently confirmed.
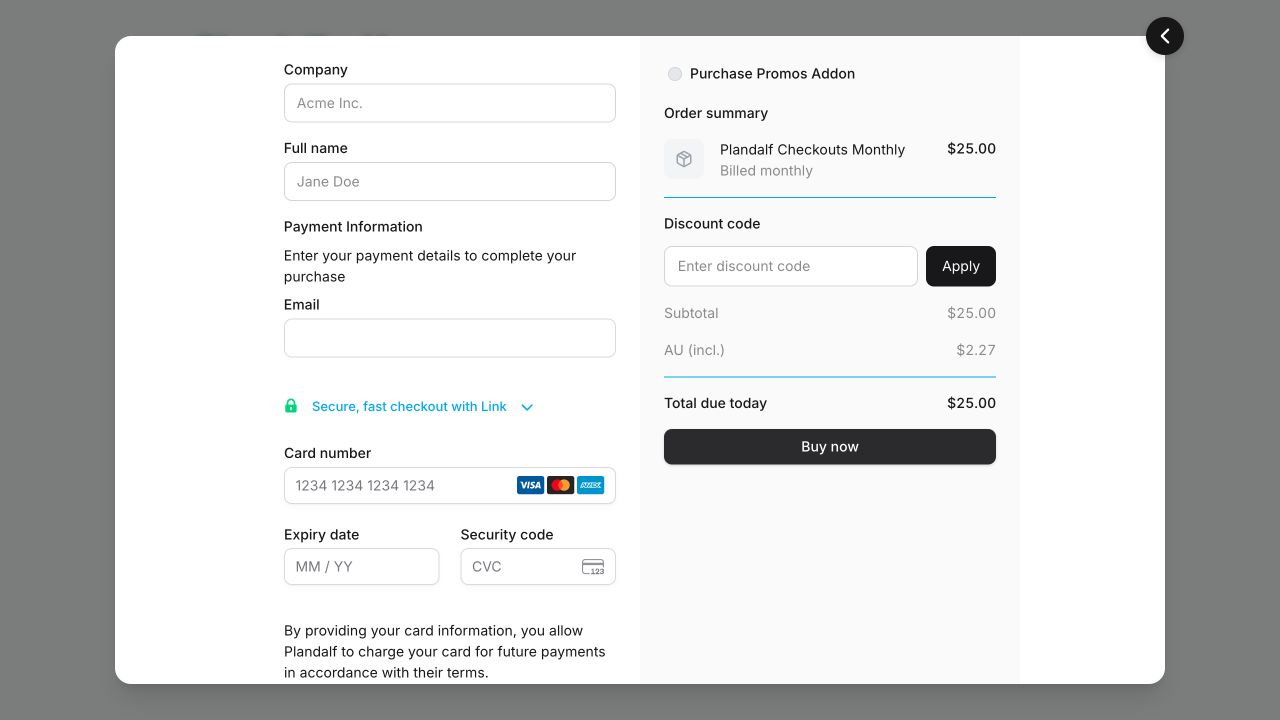
Inspect the real offer without submitting payment.
- Confirm the product and billing interval.
- Confirm the total due today.
- Use this control to close checkout.
Close checkout
Use the close control at the top right of the checkout. Verify the overlay disappears and the Vue component remains visible.
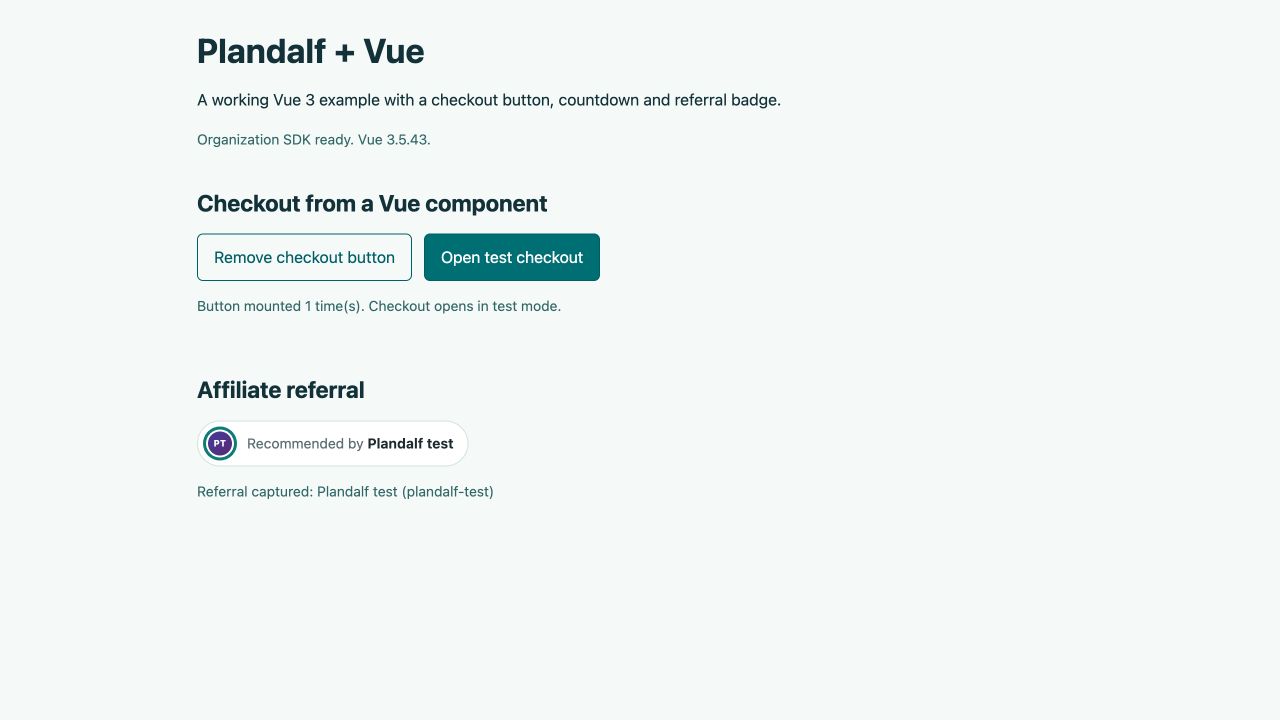
The Vue component remains mounted after checkout closes.
- Choose Remove checkout button for the cleanup test.
Remove the button
Click Remove checkout button. Verify the buying button disappears and the page reports Button is not mounted.
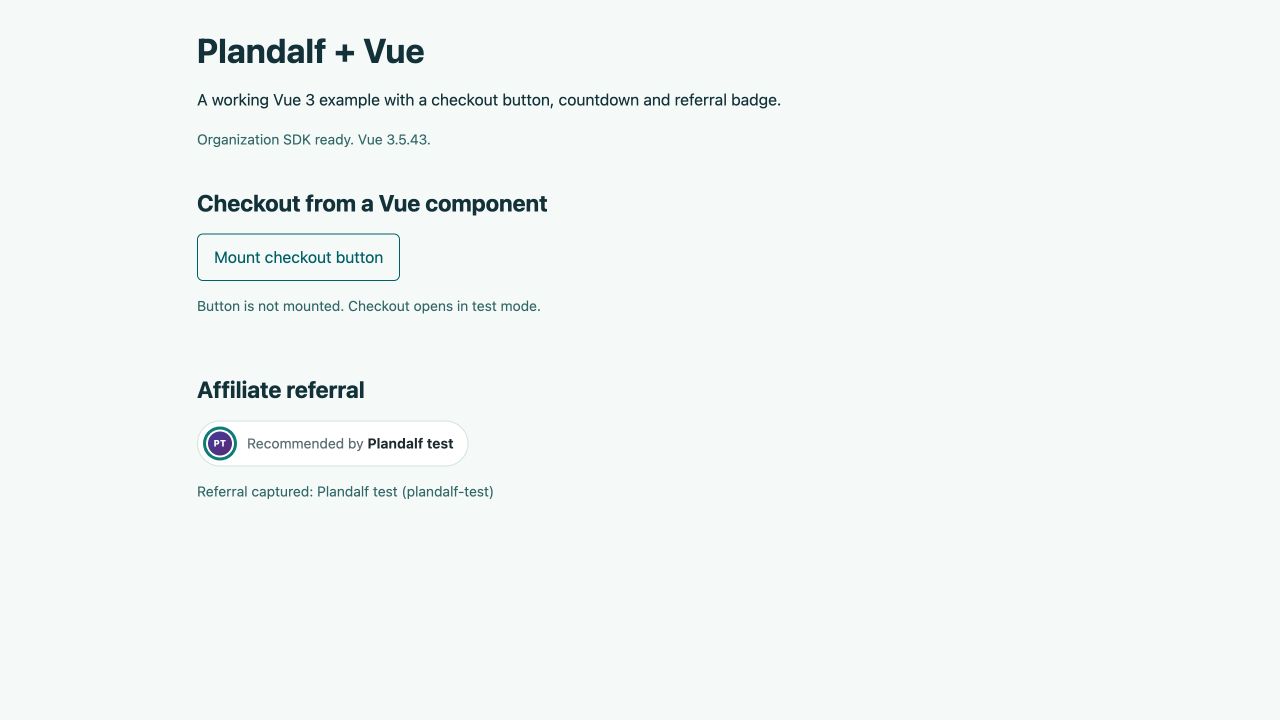
Removal should delete the buying button while keeping the example active.
- Choose Mount checkout button to add it again.
- Confirm Button is not mounted.
Mount the button again
Click Mount checkout button again. Verify the button returns and the mount count is two.
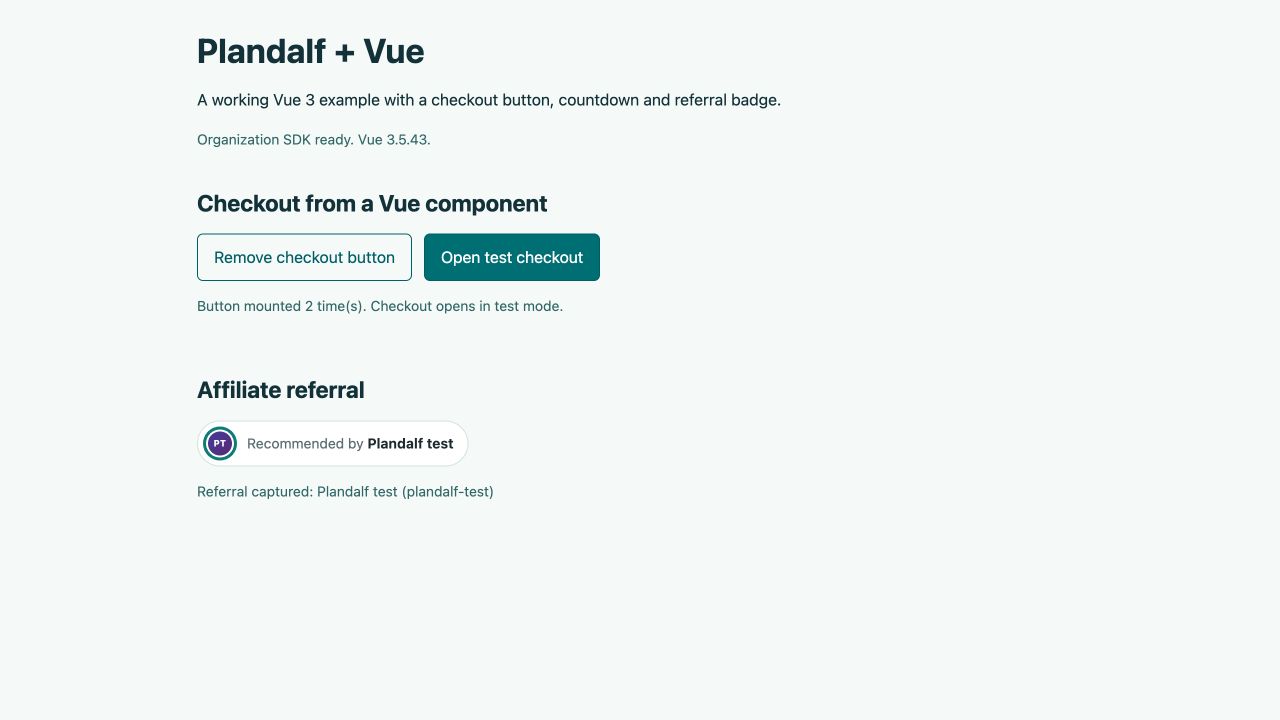
A clean remount restores one checkout action and increments the count once.
- Confirm Open test checkout returned.
- Confirm the mount count is two.