Stripe Integration
You will learn the following:
- Connect Stripe via OAuth in one click
- Import your products and pricing
- Keep customer data in sync automatically
Before you start
Quick Connection
Plandalf integrates directly with your Stripe account through a secure OAuth connection. This allows us to automatically import your products, prices, customers, and subscription data—no manual setup required.
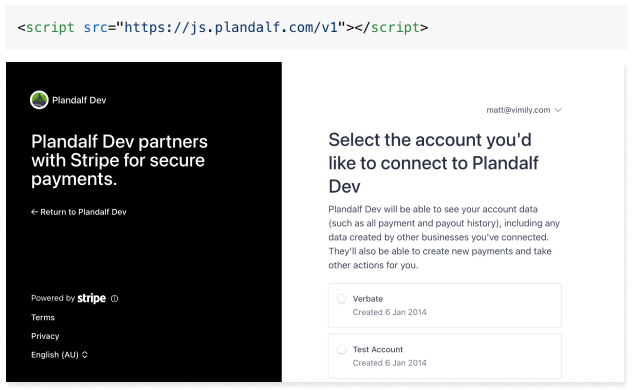
1. Connect Your Account
Click "Connect with Stripe" in your Plandalf dashboard to start the OAuth flow. You'll be redirected to Stripe to approve the connection, giving Plandalf permission to:
- Read your products and prices
- Access customer and subscription data
- Listen for account updates via webhooks
Once approved, you'll be redirected back to Plandalf where we'll automatically import your existing Stripe data.
2. Verify Your Data
After connecting, you'll see your Stripe data appear in the Plandalf dashboard:
- Products and prices are available for paywall creation
- Existing customers are imported with their subscription status
- Historical subscription data is available for analytics
Take a moment to verify everything looks correct. You can always refresh the sync if needed.
3. Set Up Webhooks
Plandalf automatically configures a webhook endpoint in your Stripe account. This keeps your data in sync by listening for events like:
// Example events we handle automatically
stripe.events = [
  'customer.subscription.created',
  'customer.subscription.updated',
  'customer.subscription.deleted',
  'price.created',
  'price.updated'
]
The webhook ensures that any changes in Stripe—like new subscriptions or price updates—are instantly reflected in your Plandalf paywalls.
Next Steps
Now that your Stripe account is connected, you're ready to create your first paywall. Our paywall builder lets you:
- Design beautiful checkout experiences
- A/B test different pricing strategies
- Track conversion rates and revenue
Learn more about creating paywalls →
Advanced Configuration
Need more control? Check out our guides for: