---
description: "Add a Plandalf hosted checkout button to Carrd, understand the Pro Standard embed requirement, and verify the published buyer journey."
---
# Carrd

Carrd can send a visitor to a Plandalf hosted checkout from a normal button. Carrd’s **Embed** element can also carry the Plandalf SDK and an inline checkout, but Carrd currently requires Pro Standard for that element.

> [!WARNING]
> **What this replay proves**
> The screenshots below come from Carrd’s real anonymous editor. They prove the button setup and show the current account and plan gates. The draft was not published, the Embed path was not available, and the test checkout did not have a verified payment-provider sandbox. Complete the final verification steps before using this on a live site.

## Before you start

Prepare:

-   a Carrd account and a test site you are allowed to publish;
-   Carrd Pro Standard or a higher plan if you need an inline checkout or countdown;
-   a published Plandalf Offer and its **Test mode link** from **Share → Hosted link**; and
-   a confirmed processor sandbox and matching test price before submitting a payment.

Use the normal button path first. It works without adding JavaScript to Carrd and gives you a smaller surface to test.

## Add a hosted checkout button

### 1\. Choose a starting point

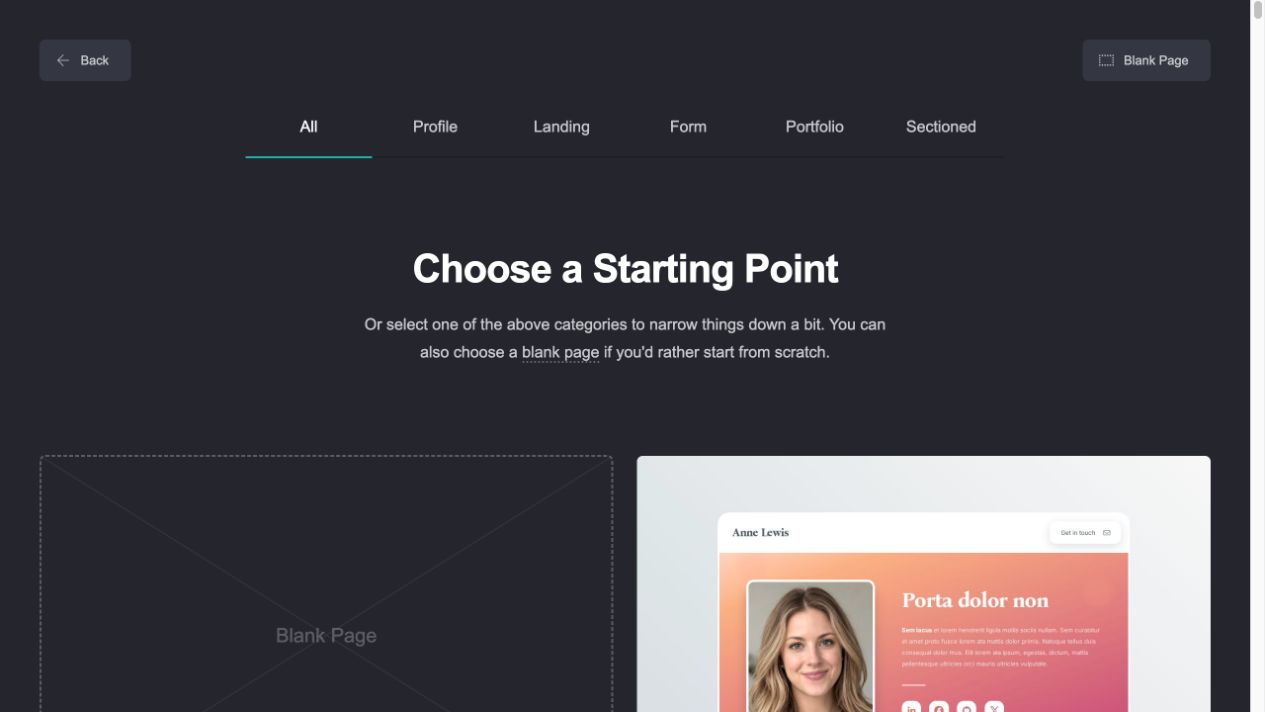
Open Carrd and choose **Choose a Starting Point**. Select **Blank Page** for a clean integration test.

<figure data-docs-annotated-screenshot="" style="margin:1.5rem 0"><div style="position:relative;line-height:0"><img src="/images/integrations/carrd/2026-10-08/01-starting-point.jpg" alt="Carrd starting-point picker with Blank Page available" width="1280" height="720" loading="lazy" style="display:block;width:100%;height:auto;margin:0;border-radius:0"><svg xmlns="http://www.w3.org/2000/svg" viewBox="0 0 1280 720" aria-hidden="true" focusable="false" style="position:absolute;inset:0;width:100%;height:100%;pointer-events:none"><g><line x1="960" y1="170" x2="1118" y2="60" stroke="white" stroke-width="12"></line><line x1="960" y1="170" x2="1118" y2="60" stroke="#b5264d" stroke-width="6"></line><polygon points="1118,60 1100.1052094988258,61.94331493049628 1109.966646557545,76.10792452392907" fill="#b5264d"></polygon><circle cx="960" cy="170" r="27" fill="#b5264d" stroke="white" stroke-width="4"></circle><text x="960" y="180" text-anchor="middle" fill="white" font-size="29" font-weight="700" font-family="system-ui,sans-serif">1</text></g></svg></div><figcaption style="line-height:1.6;margin-top:1rem"><p>Start from a blank page so the checkout test is easy to identify.</p><ol style="list-style-type:decimal;padding-left:1.5rem"><li>Choose Blank Page.</li></ol></figcaption></figure>

### 2\. Dismiss the editor introduction

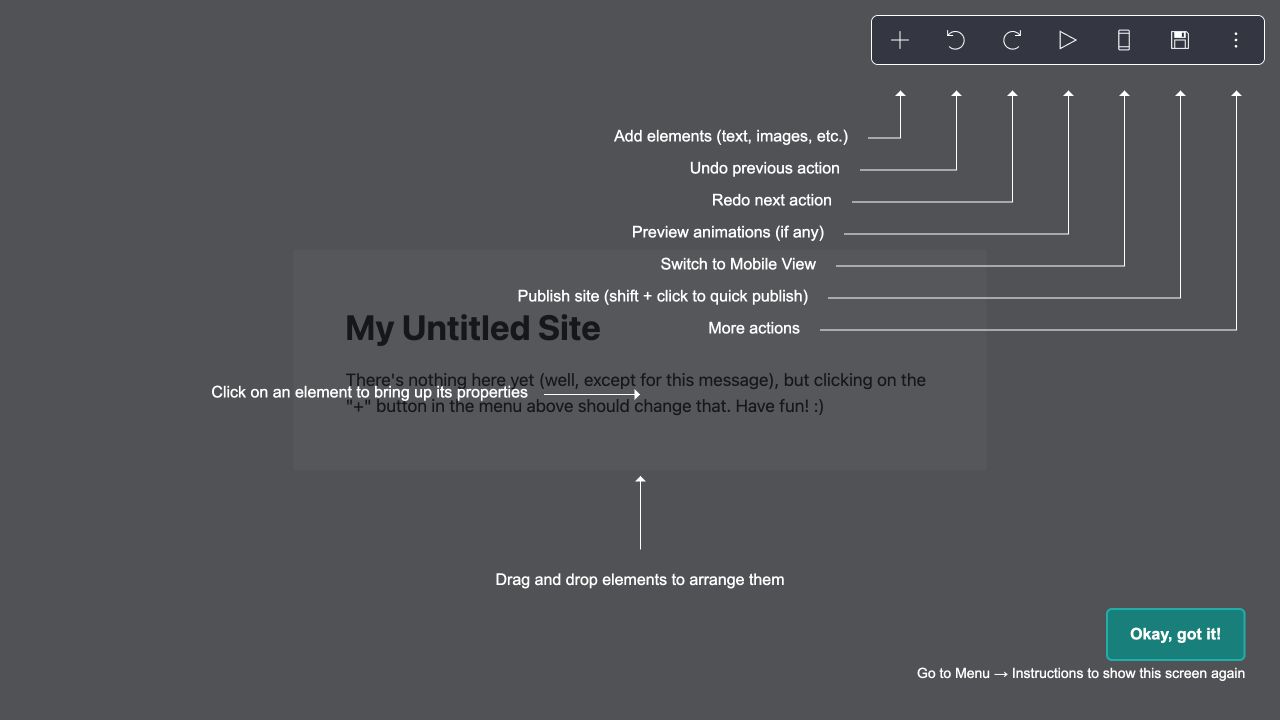
Review the toolbar labels, then choose **Okay, got it!** to enter the canvas.

<figure data-docs-annotated-screenshot="" style="margin:1.5rem 0"><div style="position:relative;line-height:0"><img src="/images/integrations/carrd/2026-10-08/02-editor-introduction.jpg" alt="Carrd editor introduction explaining the toolbar" width="1280" height="720" loading="lazy" style="display:block;width:100%;height:auto;margin:0;border-radius:0"><svg xmlns="http://www.w3.org/2000/svg" viewBox="0 0 1280 720" aria-hidden="true" focusable="false" style="position:absolute;inset:0;width:100%;height:100%;pointer-events:none"><g><line x1="930" y1="570" x2="1172" y2="635" stroke="white" stroke-width="12"></line><line x1="930" y1="570" x2="1172" y2="635" stroke="#b5264d" stroke-width="6"></line><polygon points="1172,635 1158.9827740780506,622.5681124000846 1154.5056901166424,639.2366403794817" fill="#b5264d"></polygon><circle cx="930" cy="570" r="27" fill="#b5264d" stroke="white" stroke-width="4"></circle><text x="930" y="580" text-anchor="middle" fill="white" font-size="29" font-weight="700" font-family="system-ui,sans-serif">1</text></g></svg></div><figcaption style="line-height:1.6;margin-top:1rem"><p>The introduction identifies Add, Preview, Mobile View and Publish before you edit.</p><ol style="list-style-type:decimal;padding-left:1.5rem"><li>Choose Okay, got it!</li></ol></figcaption></figure>

### 3\. Open the Add menu

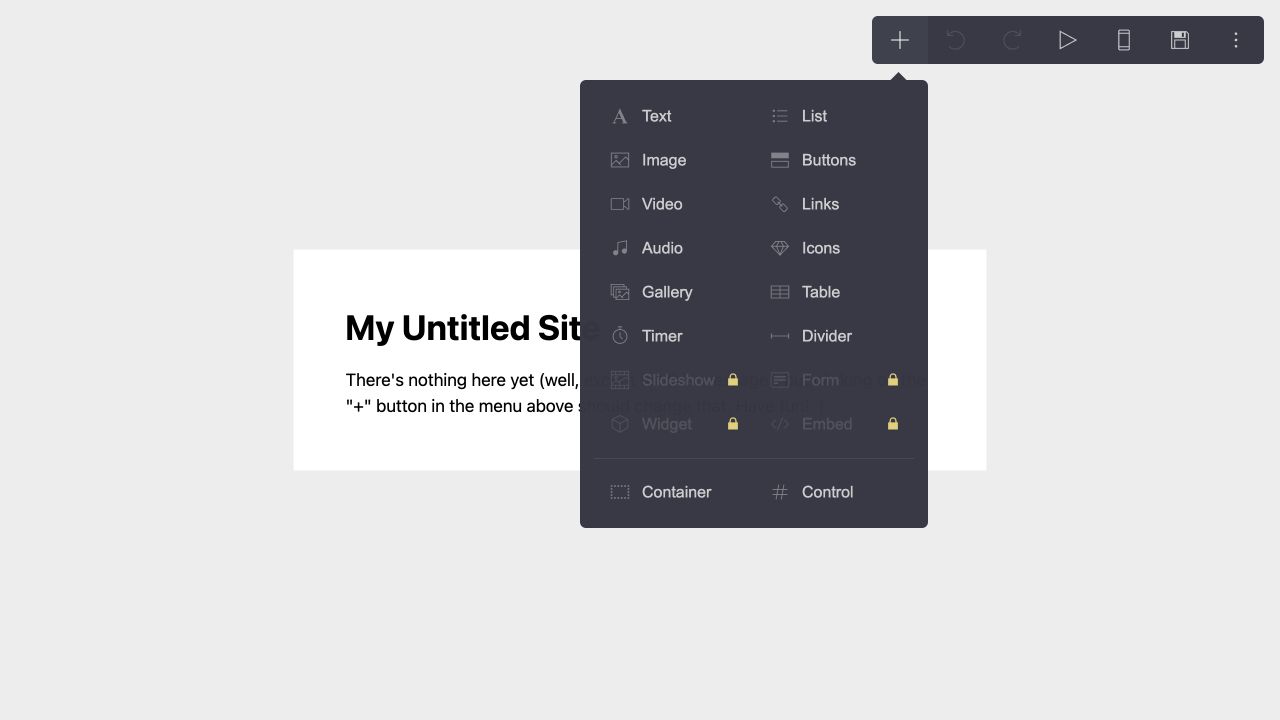
Choose the **+** control. The menu shows both **Buttons** and **Embed**.

<figure data-docs-annotated-screenshot="" style="margin:1.5rem 0"><div style="position:relative;line-height:0"><img src="/images/integrations/carrd/2026-10-08/03-add-elements-embed-locked.jpg" alt="Carrd Add menu with Buttons available and Embed locked" width="1280" height="720" loading="lazy" style="display:block;width:100%;height:auto;margin:0;border-radius:0"><svg xmlns="http://www.w3.org/2000/svg" viewBox="0 0 1280 720" aria-hidden="true" focusable="false" style="position:absolute;inset:0;width:100%;height:100%;pointer-events:none"><g><line x1="1040" y1="105" x2="900" y2="40" stroke="white" stroke-width="12"></line><line x1="1040" y1="105" x2="900" y2="40" stroke="#b5264d" stroke-width="6"></line><polygon points="900,40 910.6935072959678,54.479257636739604 917.9616018327038,38.824900173000785" fill="#b5264d"></polygon><circle cx="1040" cy="105" r="27" fill="#b5264d" stroke="white" stroke-width="4"></circle><text x="1040" y="115" text-anchor="middle" fill="white" font-size="29" font-weight="700" font-family="system-ui,sans-serif">1</text></g><g><line x1="1020" y1="200" x2="812" y2="160" stroke="white" stroke-width="12"></line><line x1="1020" y1="200" x2="812" y2="160" stroke="#b5264d" stroke-width="6"></line><polygon points="812,160 825.8825624621497,171.45750668708126 829.1419399450793,154.5087437758474" fill="#b5264d"></polygon><circle cx="1020" cy="200" r="27" fill="#b5264d" stroke="white" stroke-width="4"></circle><text x="1020" y="210" text-anchor="middle" fill="white" font-size="29" font-weight="700" font-family="system-ui,sans-serif">2</text></g><g><line x1="1030" y1="350" x2="812" y2="424" stroke="white" stroke-width="12"></line><line x1="1030" y1="350" x2="812" y2="424" stroke="#b5264d" stroke-width="6"></line><polygon points="812,424 829.7320687510529,427.0941457315277 824.184311489854,410.7507527188066" fill="#b5264d"></polygon><circle cx="1030" cy="350" r="27" fill="#b5264d" stroke="white" stroke-width="4"></circle><text x="1030" y="360" text-anchor="middle" fill="white" font-size="29" font-weight="700" font-family="system-ui,sans-serif">3</text></g></svg></div><figcaption style="line-height:1.6;margin-top:1rem"><p>Use Buttons for a hosted checkout link. Embed is the inline SDK path.</p><ol style="list-style-type:decimal;padding-left:1.5rem"><li>Open Add with the plus control.</li><li>Choose Buttons for the hosted link.</li><li>Embed is locked without Pro Standard.</li></ol></figcaption></figure>

### 4\. Check the Embed requirement

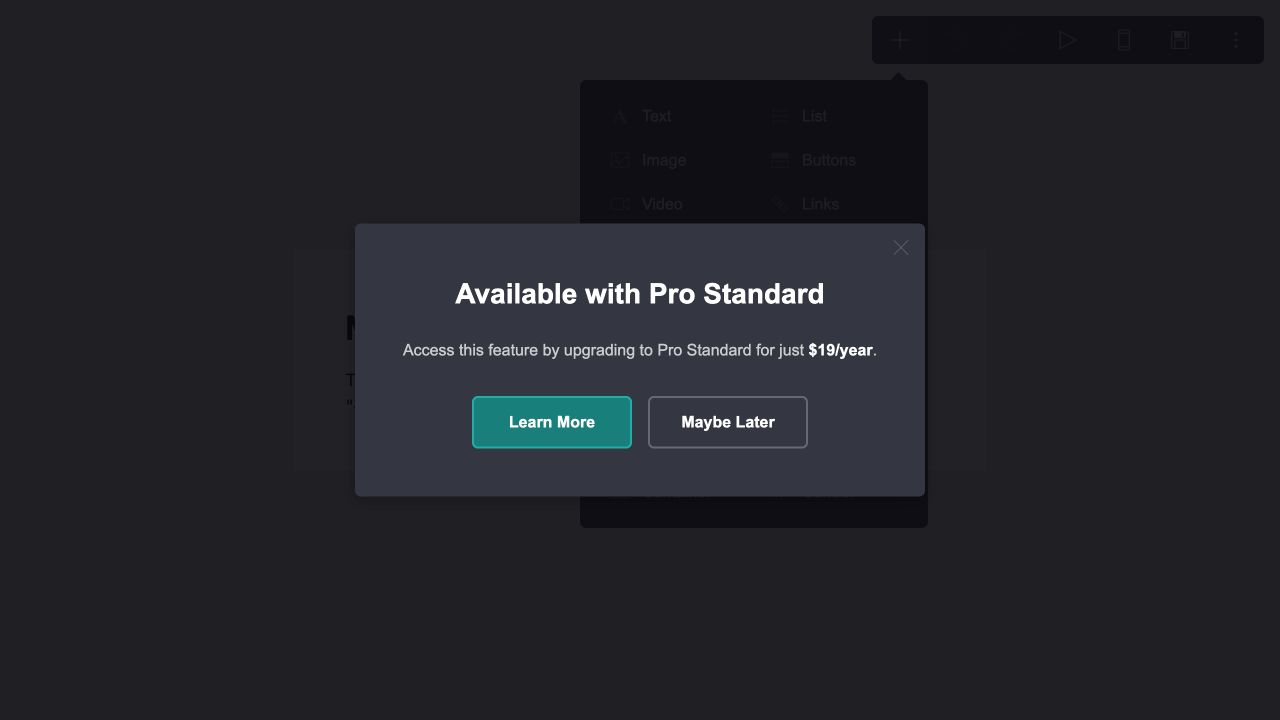
Choose **Embed** only if you need the SDK or an inline checkout. Carrd opens its Pro Standard requirement. Choose **Maybe Later** to continue with the hosted-link button without starting an upgrade.

<figure data-docs-annotated-screenshot="" style="margin:1.5rem 0"><div style="position:relative;line-height:0"><img src="/images/integrations/carrd/2026-10-08/04-embed-requires-pro-standard.jpg" alt="Carrd dialog saying Embed is available with Pro Standard" width="1280" height="720" loading="lazy" style="display:block;width:100%;height:auto;margin:0;border-radius:0"><svg xmlns="http://www.w3.org/2000/svg" viewBox="0 0 1280 720" aria-hidden="true" focusable="false" style="position:absolute;inset:0;width:100%;height:100%;pointer-events:none"><g><line x1="1030" y1="260" x2="640" y2="294" stroke="white" stroke-width="12"></line><line x1="1030" y1="260" x2="640" y2="294" stroke="#b5264d" stroke-width="6"></line><polygon points="640,294 656.4862839628597,301.2251256802877 654.9873108618826,284.03102246319634" fill="#b5264d"></polygon><circle cx="1030" cy="260" r="27" fill="#b5264d" stroke="white" stroke-width="4"></circle><text x="1030" y="270" text-anchor="middle" fill="white" font-size="29" font-weight="700" font-family="system-ui,sans-serif">1</text></g><g><line x1="1020" y1="500" x2="728" y2="423" stroke="white" stroke-width="12"></line><line x1="1020" y1="500" x2="728" y2="423" stroke="#b5264d" stroke-width="6"></line><polygon points="728,423 741.0739346272468,435.3722363929274 745.4747549677035,418.683411205741" fill="#b5264d"></polygon><circle cx="1020" cy="500" r="27" fill="#b5264d" stroke="white" stroke-width="4"></circle><text x="1020" y="510" text-anchor="middle" fill="white" font-size="29" font-weight="700" font-family="system-ui,sans-serif">2</text></g></svg></div><figcaption style="line-height:1.6;margin-top:1rem"><p>Carrd currently puts its Embed element behind Pro Standard.</p><ol style="list-style-type:decimal;padding-left:1.5rem"><li>Confirm the required plan.</li><li>Choose Maybe Later to avoid upgrading.</li></ol></figcaption></figure>

### 5\. Add a button

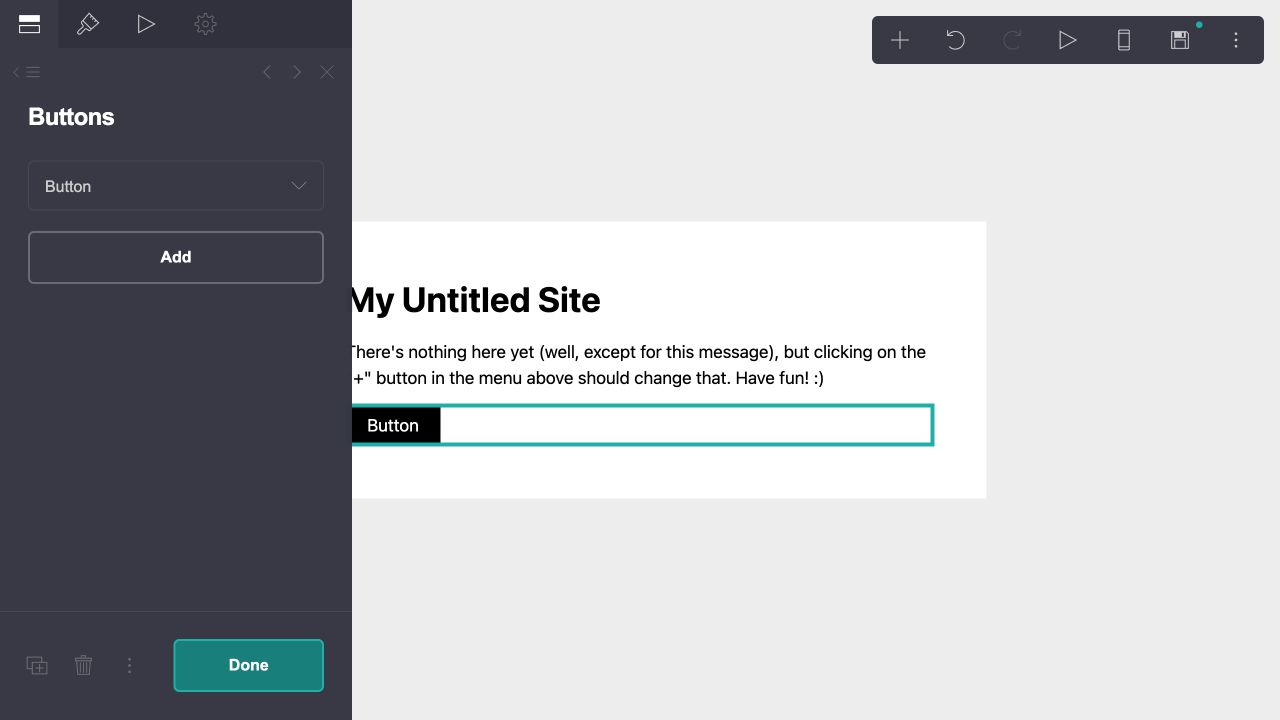
Return to **Add → Buttons**, then choose **Add**. Carrd places a button on the canvas and opens its settings.

<figure data-docs-annotated-screenshot="" style="margin:1.5rem 0"><div style="position:relative;line-height:0"><img src="/images/integrations/carrd/2026-10-08/05-buttons-element.jpg" alt="Carrd Buttons panel with a new button on the canvas" width="1280" height="720" loading="lazy" style="display:block;width:100%;height:auto;margin:0;border-radius:0"><svg xmlns="http://www.w3.org/2000/svg" viewBox="0 0 1280 720" aria-hidden="true" focusable="false" style="position:absolute;inset:0;width:100%;height:100%;pointer-events:none"><g><line x1="320" y1="330" x2="176" y2="258" stroke="white" stroke-width="12"></line><line x1="320" y1="330" x2="176" y2="258" stroke="#b5264d" stroke-width="6"></line><polygon points="176,258 186.26950556255167,272.78300563149185 193.9881078427245,257.34580107114624" fill="#b5264d"></polygon><circle cx="320" cy="330" r="27" fill="#b5264d" stroke="white" stroke-width="4"></circle><text x="320" y="340" text-anchor="middle" fill="white" font-size="29" font-weight="700" font-family="system-ui,sans-serif">1</text></g><g><line x1="700" y1="530" x2="393" y2="425" stroke="white" stroke-width="12"></line><line x1="700" y1="530" x2="393" y2="425" stroke="#b5264d" stroke-width="6"></line><polygon points="393,425 405.1537706666182,438.2772684910433 410.73914650888344,421.9466934093726" fill="#b5264d"></polygon><circle cx="700" cy="530" r="27" fill="#b5264d" stroke="white" stroke-width="4"></circle><text x="700" y="540" text-anchor="middle" fill="white" font-size="29" font-weight="700" font-family="system-ui,sans-serif">2</text></g></svg></div><figcaption style="line-height:1.6;margin-top:1rem"><p>Add one normal button before changing its label and destination.</p><ol style="list-style-type:decimal;padding-left:1.5rem"><li>Choose Add.</li><li>The new button appears on the canvas.</li></ol></figcaption></figure>

### 6\. Name the button

Expand the button row and set **Label** to a direct action such as **Join the workshop** or **Open checkout**.

<figure data-docs-annotated-screenshot="" style="margin:1.5rem 0"><div style="position:relative;line-height:0"><img src="/images/integrations/carrd/2026-10-08/06-button-label.jpg" alt="Carrd button settings with Join the workshop as the label" width="1280" height="720" loading="lazy" style="display:block;width:100%;height:auto;margin:0;border-radius:0"><svg xmlns="http://www.w3.org/2000/svg" viewBox="0 0 1280 720" aria-hidden="true" focusable="false" style="position:absolute;inset:0;width:100%;height:100%;pointer-events:none"><g><line x1="330" y1="255" x2="167" y2="293" stroke="white" stroke-width="12"></line><line x1="330" y1="255" x2="167" y2="293" stroke="#b5264d" stroke-width="6"></line><polygon points="167,293 184.34324931173353,297.8178525621956 180.4246807345456,281.0092557705737" fill="#b5264d"></polygon><circle cx="330" cy="255" r="27" fill="#b5264d" stroke="white" stroke-width="4"></circle><text x="330" y="265" text-anchor="middle" fill="white" font-size="29" font-weight="700" font-family="system-ui,sans-serif">1</text></g></svg></div><figcaption style="line-height:1.6;margin-top:1rem"><p>Use a label that tells the visitor they are opening checkout.</p><ol style="list-style-type:decimal;padding-left:1.5rem"><li>Enter the button label.</li></ol></figcaption></figure>

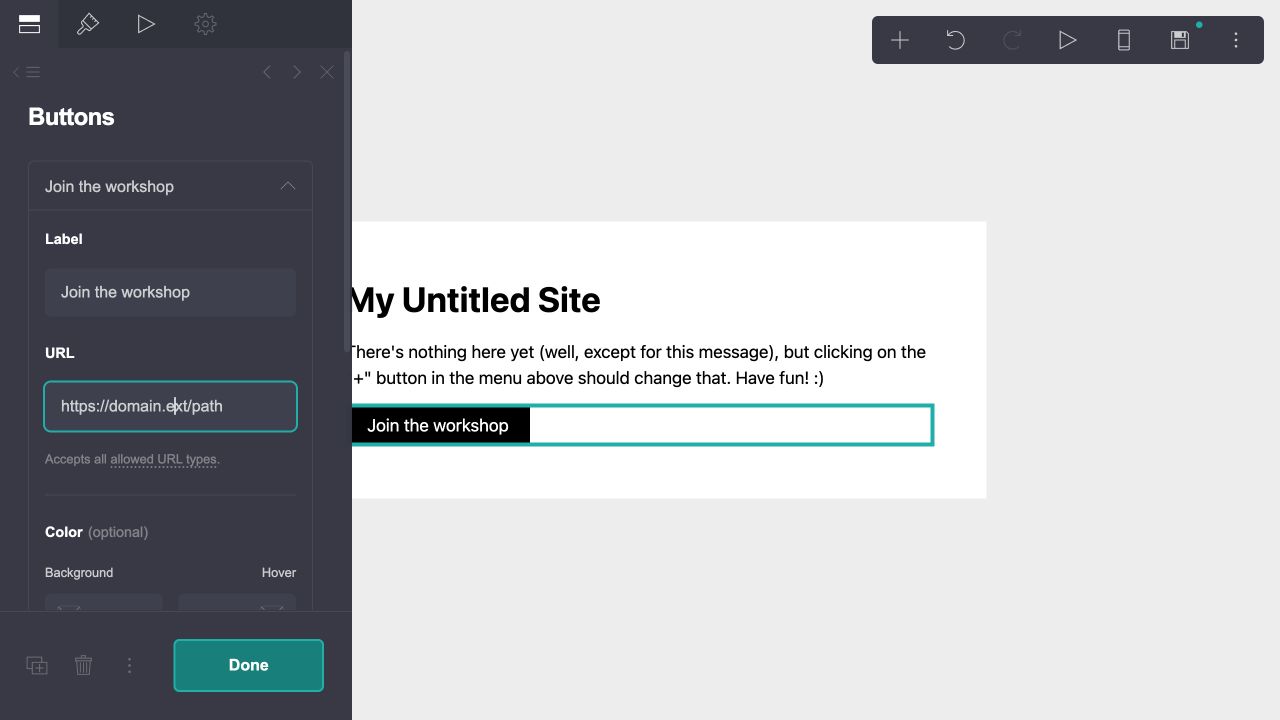
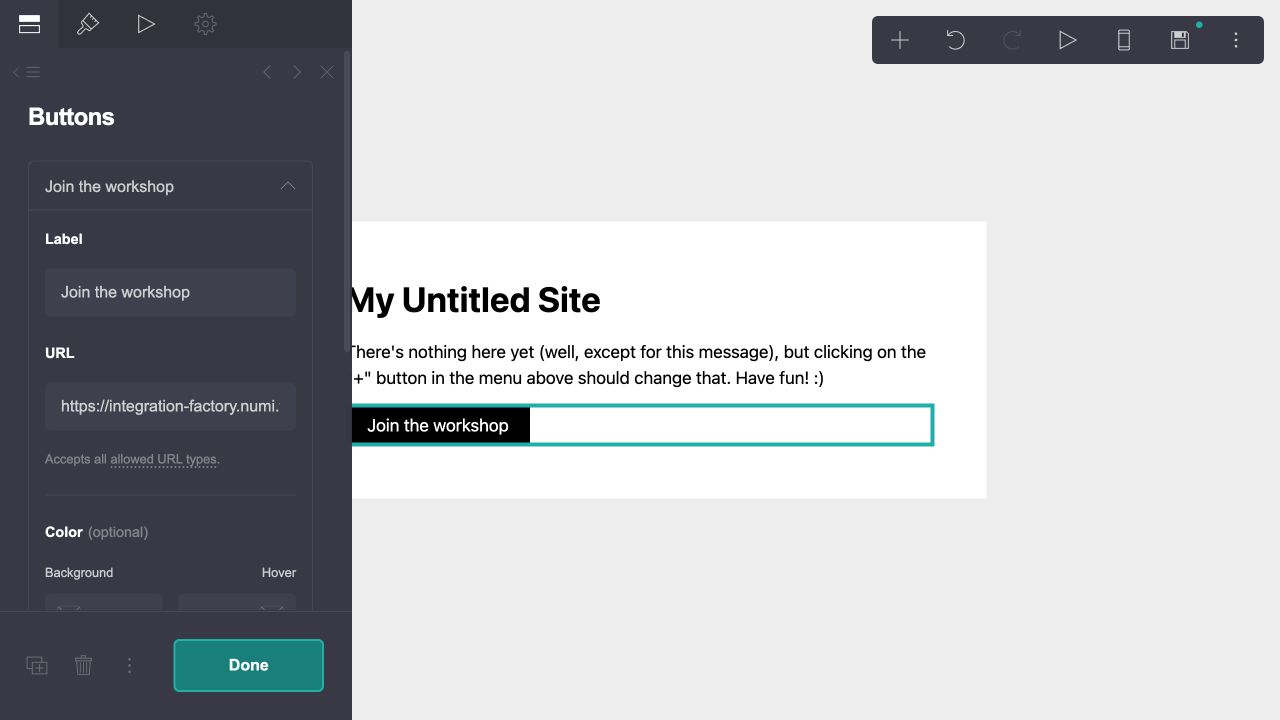
### 7\. Add the Plandalf checkout URL

Paste the Offer’s **Test mode link** into **URL**. Use the exact address copied from Plandalf; do not rebuild it from the Offer name. The replay used a local test host, so replace it with your public checkout address before publishing.

<figure data-docs-annotated-screenshot="" style="margin:1.5rem 0"><div style="position:relative;line-height:0"><img src="/images/integrations/carrd/2026-10-08/07-test-destination.jpg" alt="Carrd button URL field containing a Plandalf test checkout address" width="1280" height="720" loading="lazy" style="display:block;width:100%;height:auto;margin:0;border-radius:0"><svg xmlns="http://www.w3.org/2000/svg" viewBox="0 0 1280 720" aria-hidden="true" focusable="false" style="position:absolute;inset:0;width:100%;height:100%;pointer-events:none"><g><line x1="340" y1="420" x2="174" y2="405" stroke="white" stroke-width="12"></line><line x1="340" y1="420" x2="174" y2="405" stroke="#b5264d" stroke-width="6"></line><polygon points="174,405 188.95576338790943,415.0162438810598 190.5090120471772,397.8269587184962" fill="#b5264d"></polygon><circle cx="340" cy="420" r="27" fill="#b5264d" stroke="white" stroke-width="4"></circle><text x="340" y="430" text-anchor="middle" fill="white" font-size="29" font-weight="700" font-family="system-ui,sans-serif">1</text></g></svg></div><figcaption style="line-height:1.6;margin-top:1rem"><p>Paste the complete Plandalf test-mode checkout URL into Carrd's URL field.</p><ol style="list-style-type:decimal;padding-left:1.5rem"><li>Paste the complete test link.</li></ol></figcaption></figure>

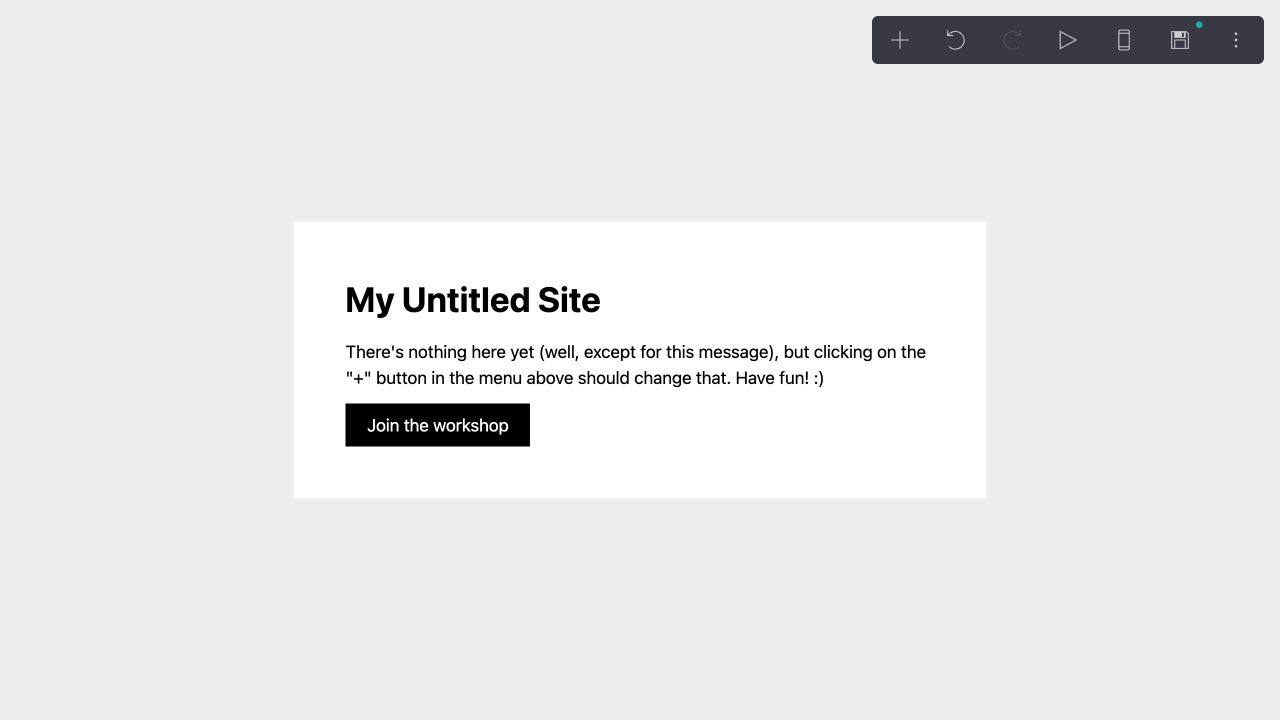
### 8\. Apply the button fields

Choose **Done** and confirm that the intended label appears on the canvas.

<figure data-docs-annotated-screenshot="" style="margin:1.5rem 0"><div style="position:relative;line-height:0"><img src="/images/integrations/carrd/2026-10-08/08-button-on-canvas.jpg" alt="Carrd canvas showing a Join the workshop button" width="1280" height="720" loading="lazy" style="display:block;width:100%;height:auto;margin:0;border-radius:0"><svg xmlns="http://www.w3.org/2000/svg" viewBox="0 0 1280 720" aria-hidden="true" focusable="false" style="position:absolute;inset:0;width:100%;height:100%;pointer-events:none"><g><line x1="700" y1="520" x2="437" y2="425" stroke="white" stroke-width="12"></line><line x1="700" y1="520" x2="437" y2="425" stroke="#b5264d" stroke-width="6"></line><polygon points="437,425 448.925170791542,438.48296338319415 454.7887197527267,422.2501909959143" fill="#b5264d"></polygon><circle cx="700" cy="520" r="27" fill="#b5264d" stroke="white" stroke-width="4"></circle><text x="700" y="530" text-anchor="middle" fill="white" font-size="29" font-weight="700" font-family="system-ui,sans-serif">1</text></g></svg></div><figcaption style="line-height:1.6;margin-top:1rem"><p>The canvas confirms the button label, but it does not prove the destination works.</p><ol style="list-style-type:decimal;padding-left:1.5rem"><li>Confirm the button on the canvas.</li></ol></figcaption></figure>

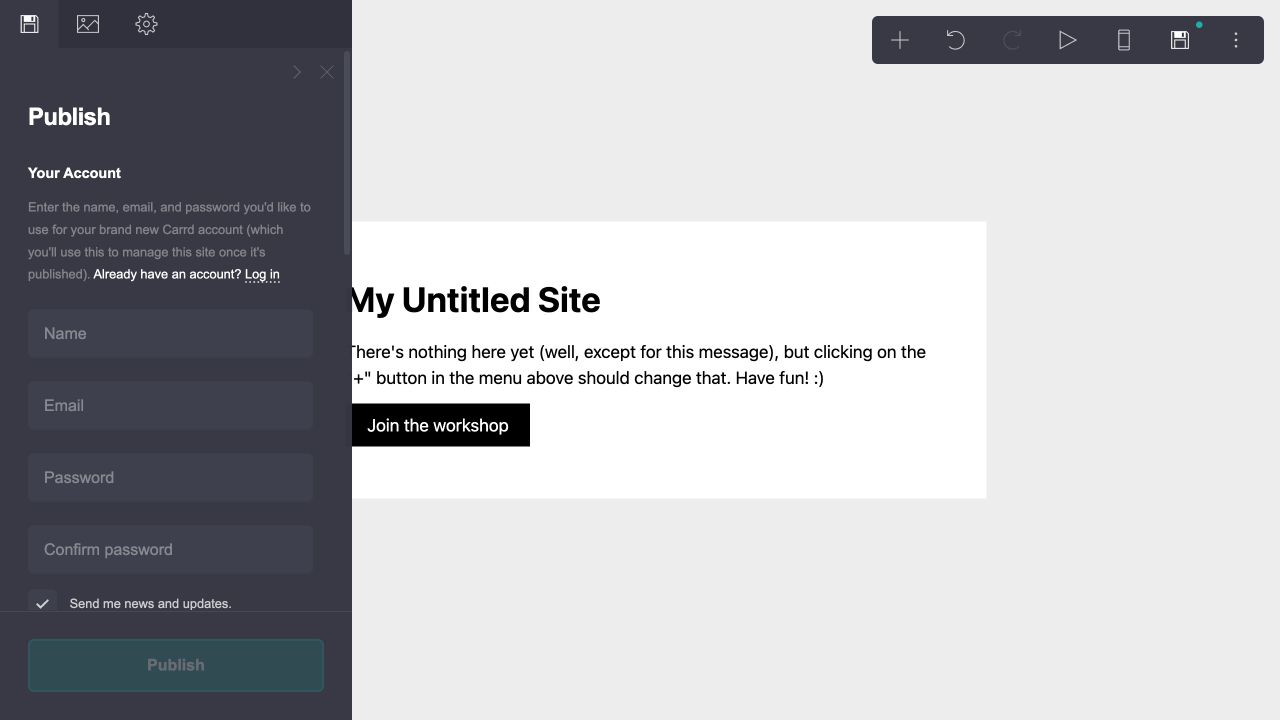
### 9\. Open the Publish panel

Choose the toolbar **Publish** control. In a signed-out editor, Carrd asks for account details before it can save or publish the site. Sign in to the designated test account rather than creating an accidental second account.

<figure data-docs-annotated-screenshot="" style="margin:1.5rem 0"><div style="position:relative;line-height:0"><img src="/images/integrations/carrd/2026-10-08/09-publish-account-required.jpg" alt="Carrd Publish panel requiring account details" width="1280" height="720" loading="lazy" style="display:block;width:100%;height:auto;margin:0;border-radius:0"><svg xmlns="http://www.w3.org/2000/svg" viewBox="0 0 1280 720" aria-hidden="true" focusable="false" style="position:absolute;inset:0;width:100%;height:100%;pointer-events:none"><g><line x1="440" y1="120" x2="177" y2="116" stroke="white" stroke-width="12"></line><line x1="440" y1="120" x2="177" y2="116" stroke="#b5264d" stroke-width="6"></line><polygon points="177,116 192.6634250295288,124.86888472945333 192.92589382868795,107.6115611847401" fill="#b5264d"></polygon><circle cx="440" cy="120" r="27" fill="#b5264d" stroke="white" stroke-width="4"></circle><text x="440" y="130" text-anchor="middle" fill="white" font-size="29" font-weight="700" font-family="system-ui,sans-serif">1</text></g><g><line x1="425" y1="285" x2="263" y2="274" stroke="white" stroke-width="12"></line><line x1="425" y1="285" x2="263" y2="274" stroke="#b5264d" stroke-width="6"></line><polygon points="263,274 278.1755777086185,283.67997113682065 279.3448144742602,266.46030240646127" fill="#b5264d"></polygon><circle cx="425" cy="285" r="27" fill="#b5264d" stroke="white" stroke-width="4"></circle><text x="425" y="295" text-anchor="middle" fill="white" font-size="29" font-weight="700" font-family="system-ui,sans-serif">2</text></g></svg></div><figcaption style="line-height:1.6;margin-top:1rem"><p>An authenticated Carrd account is required before the test page can be published.</p><ol style="list-style-type:decimal;padding-left:1.5rem"><li>The Publish panel requires an account.</li><li>Use Log in for an existing test account.</li></ol></figcaption></figure>

## Add an inline checkout or countdown

After confirming that the Carrd site has Pro Standard, add an **Embed** element and install the same markup described in [Add checkout to your site](https://plandalf.com/docs/product-guides/checkouts/add-to-site):

```html
<script src="https://YOUR_ACCOUNT.plandalf.dev/js/plandalf-sdk.js" async></script>
<div data-plandalf-mount="YOUR_PUBLISHED_OFFER_SLUG" data-plandalf-mode="test"></div>
```

For a countdown, use the current Promo embed copied from Plandalf. Keep the script on the page once; do not add a second copy for each element.

The Embed flow still needs a fresh authenticated replay and screenshots from a Carrd plan that exposes the element. Do not treat the locked menu or the code sample as proof that it ran.

## Verify the complete journey

1.  Publish the page to the intended test domain.
2.  Open it in a signed-out browser session and select the checkout button.
3.  Confirm the Offer, product, amount, currency and test-mode indicator before entering payment details.
4.  Complete a sandbox purchase and match the successful provider payment to the paid Plandalf invoice.
5.  Verify the promised receipt, access, download or automation separately.
6.  Repeat with a declined sandbox payment and confirm it does not create a paid invoice or grant delivery.
7.  Test the published page at a phone width. If you use Embed, test that placement separately from the hosted-link button.

## Related docs

-   [Hosted checkout](https://plandalf.com/docs/product-guides/checkouts/hosted-checkout)
-   [Add checkout to your site](https://plandalf.com/docs/product-guides/checkouts/add-to-site)
-   [Create an Offer](https://plandalf.com/docs/product-guides/checkouts/create)
-   [Custom HTML](https://plandalf.com/docs/product-guides/platforms/custom-html)

## Integration overview

See [Carrd integration details](https://plandalf.com/platforms/carrd) for the supported connection paths and current constraints.

Source: https://plandalf.com/docs/product-guides/platforms/carrd